In today’s lesson I researched some different pictures that I could base my project off of.
Below are some pieces that I found.


In today’s lesson I researched some different pictures that I could base my project off of.
Below are some pieces that I found.
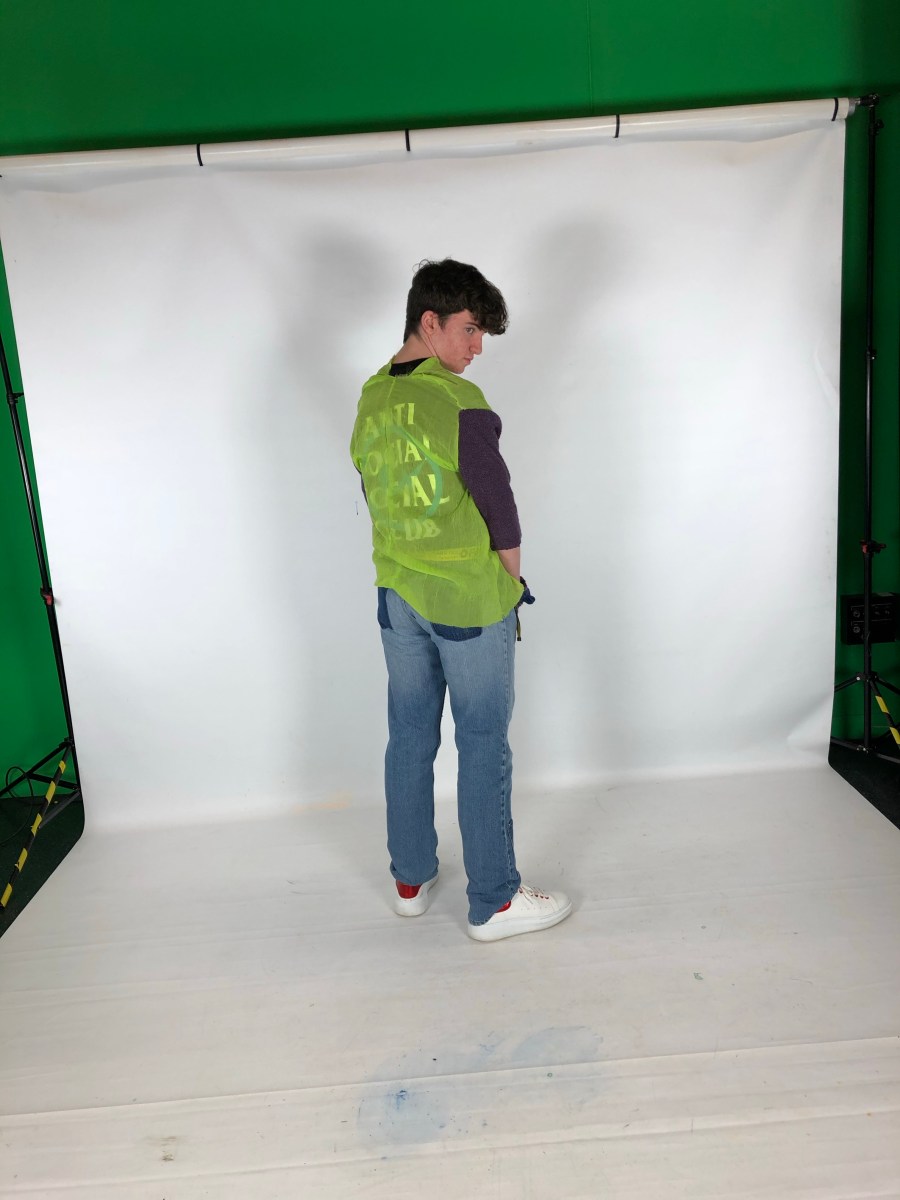
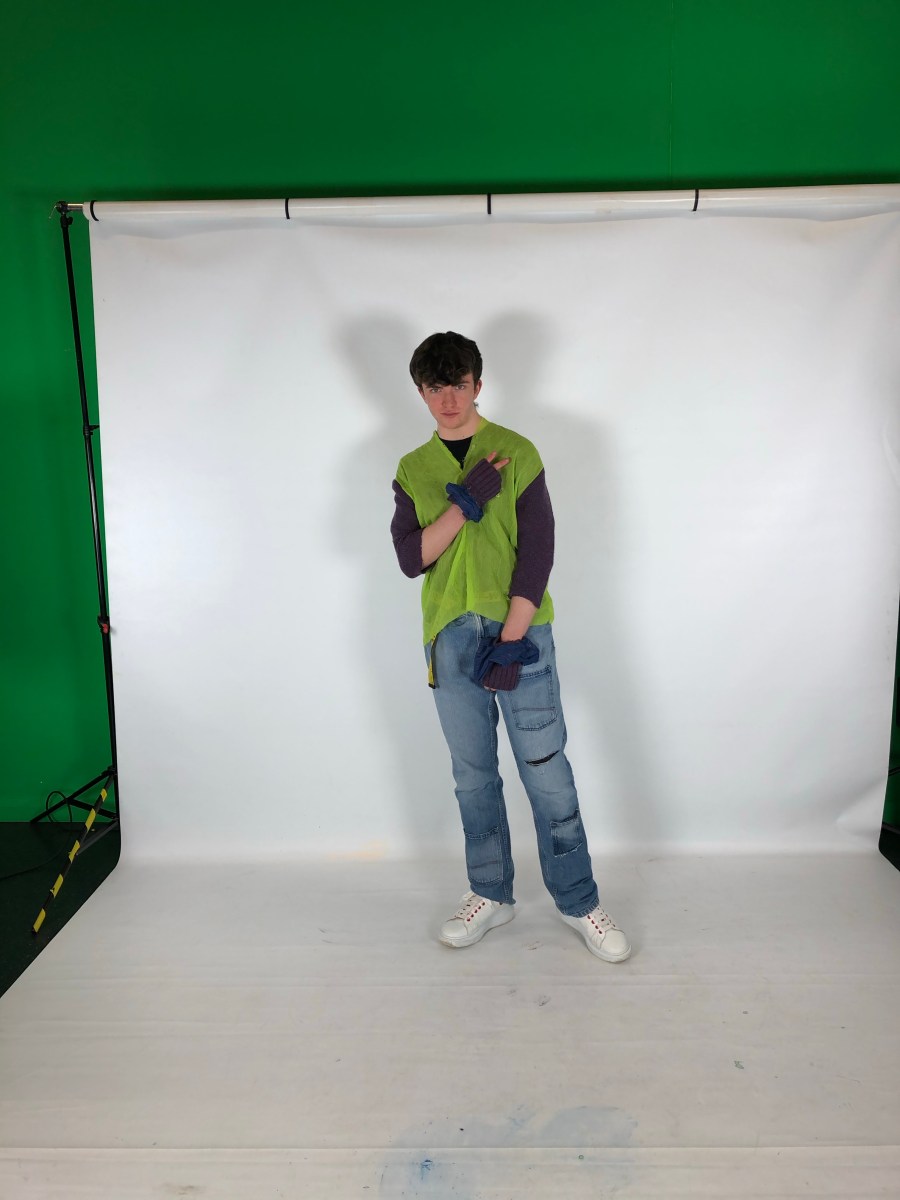
Overall I think that this project went well, I really enjoyed it even though it was stressful at times. My outfit came out the exact way that I wanted it to and my model really liked it. The only thing that I am very disappointed with is that my materials didn’t work together as the colours matched the theme I wanted perfectly.
I think that my trousers came out really well, they had the exact baggy discos vibe that I wanted. I took the pockets off of the back of the trousers and added them to the front to give the trousers a unique and modernised look. Also with all the pockets on the front it will be much harder for pick pockets to take your wallet. I think that my top came out really well as it matched the same theme as the trousers. The only thing that I would change when redoing it is that I would stitch on the sleeves and I would stitch on the donut techniques. Unfortunately the materials that I had chosen couldn’t be sewn together with a machine and I didn’t have enough time to do it by hand.
I enjoyed making the Julian Roberts technique the most as I feel the final outcome looked way better than the other techniques that I tested. I also think that it will match the style that I am going for.
I think that the Shingo Sato technique and the Julian Roberts technique go well with each other because they both compliment each other. I personally don’t think that the Julian Roberts technique takes away from the Shingo Sato as they are both very dominant in a piece.
I am going to use a see-through green material for my top and I am going to add on purple cardigan sleeves onto it. My outfit is also going to have gloves made out of the cardigans cuffs which I will use another fabric to add a Julian Roberts technique to. I am also going to use denim for the trousers as i want the outfit to have a retro disco vibe to it.
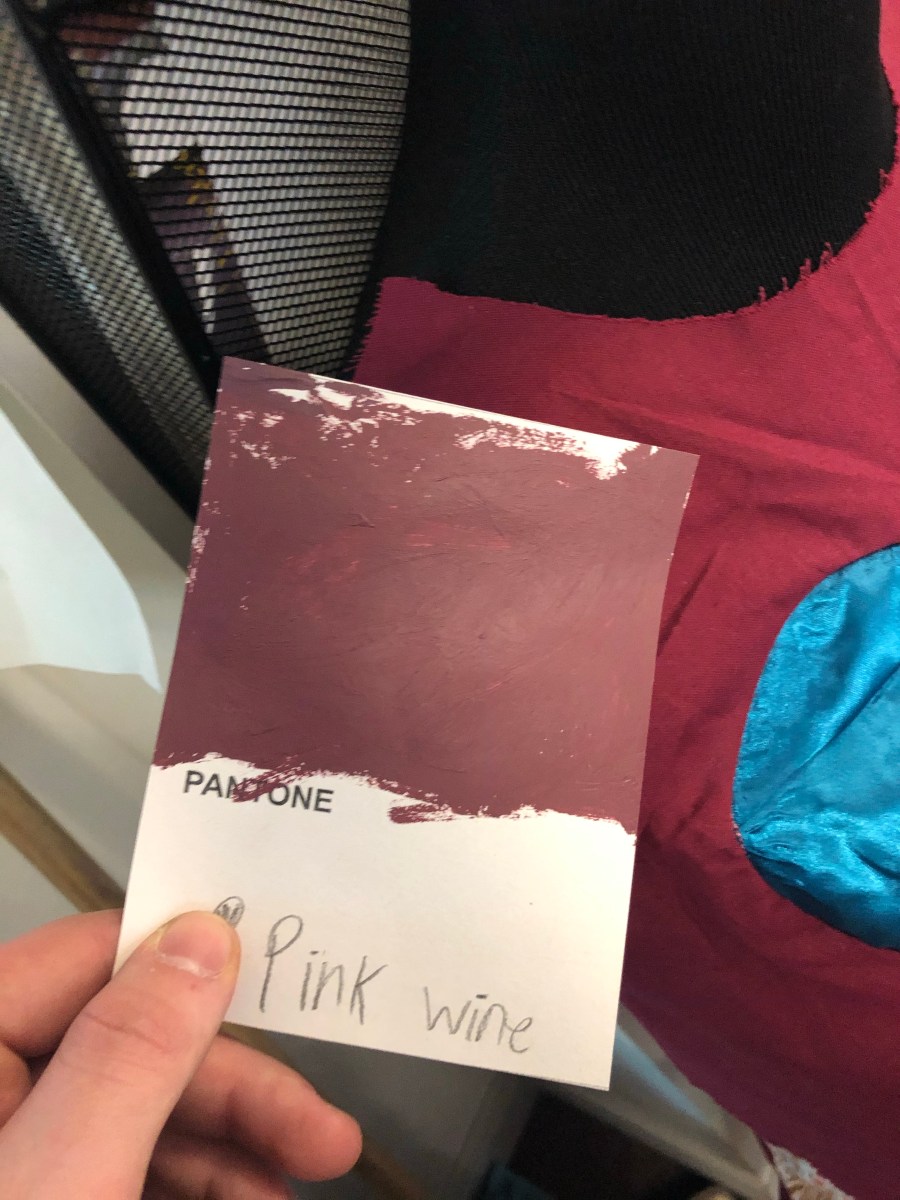
In today’s lesson we mixed paint together to create a selection of different colours and added them to a sheet or card. After that we picked our favourite one and painted it onto a different piece of card and then named the colour underneath it.
We then went around the class and tried to find our colour or a colour very similar to ours. My top three are pictures below.


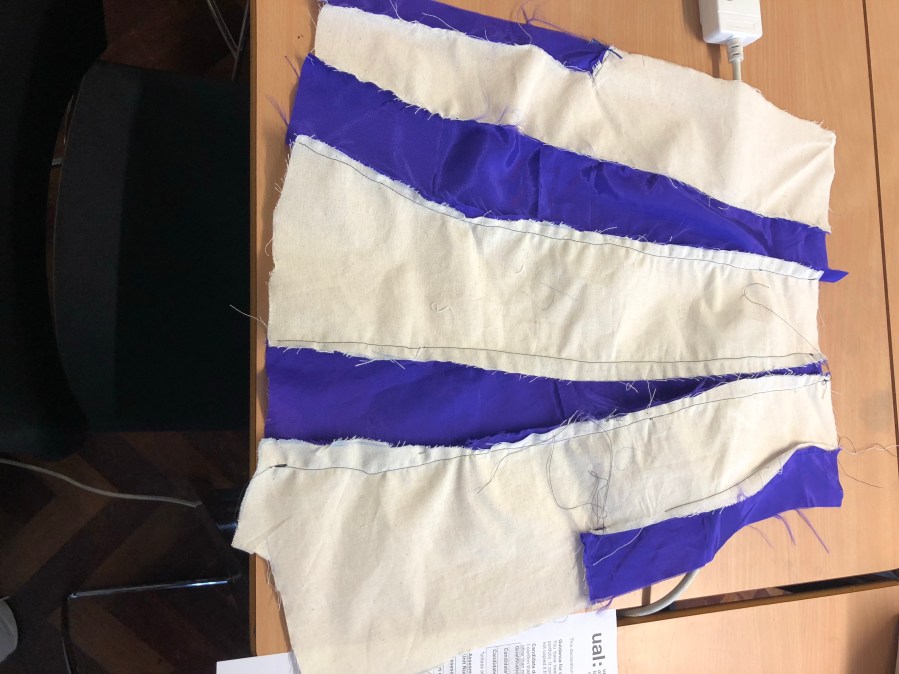
In today’s lesson Ryan and I created a Shingo Sato skirt. To do this we had to draw on a purple piece of fabric we found in the spare fabric draws. We drew seven lines on the fabric and then cut them out and randomly placed them on a piece of calico. After that we cut out the calico around the pieces and numbered them correspondingly. Then we sewed them back together and it gave us a two coloured Shingo Sato skirt.

In today’s lesson Ryan and I created a crime scene like area on the floor. We did this by having me lay on the floor and Ryan go around me with masking tape to get a rough outline. We then tidied up some of the pieces until we had our finished outline.

In today’s lesson I made a Julian Roberts donut tunnel. I firstly had to cut out two equal pieces of fabric and then cut out a circle on both pieces. I then pinned the two pieces of fabric together and sewed around the outside. I then repeated the process so that I had two pieces of fabric. Next I sewed the circles from the two pieces together and then repeated the process again so that I had a tunnel.
Unfortunately I have lost my example that I made in class so below is a picture of the technique used on a smaller scale in my final piece.

I was ill and off of collage when we made pleats so I’ve researched them instead so I won’t fall behind.
A box pleat is formed when two equal folds of fabric are folded away from each other in opposite directions on the front of a piece of fabric.

An accordion pleat is a series of permanent folds of equal width in alternating opposite directions.

A knife pleat is used for a decorative finish. The pleats are folded much like an accordion with an equal amount of space from top to bottom.

An inverted pleat is a pleat formed by bringing two folded edges toward or to a centre point on the outside of the material to form a box pleat on the inside.

Sunray pleats are bias cut knife pleats that are narrower at the top than the bottom. This produces a flared effect.