Scanography

In today’s lesson I learned how to do scanography, to do this I printed out a picture of me onto plastic and then put it on top of a piece of calico and then placed it under a scanner. After that I took the calico and washed it until the yellow tint had gone and until the picture had come through clearly. After this I put it on the drying rack.

Marbling

In today’s lesson we learnt how to create a marble effect on a piece of card. To start I put in a ready made solution. After that I got different coloured inks and drilled them into the water. Next I stirred the inks through each other with a tool. Then I put my paper on top of the ink and then when I took it out it had a nice marbled effect on it.

Lino Cutting

In today’s lesson we learnt how to cut Lino effectively. I had already done this previous to the lesson so I already knew what to do. I used the tool to scrape out my shape and then went over the top of it with a roller. After that I stamped it onto a piece of paper. I am very happy with the way this turned out as it was a better result than I had done before.

Shibori

In today’s lesson I learnt a new technique called Shibori, to do this I had to get some material and then push a button into it and use an elastic band to tie underneath the button, I did this a few times on both pieces of material. After that I put them into a steamer and left them for 30-45 minutes while I went on my lunch break. When I got back I took them out, took off the elastic bands and took the buttons out and then the material stayed in place of where the buttons were.

Embroidery Into Imagery

In today’s lesson I started embroidering my print, I decided to do this as I wanted to embroider just up to the half way mark of on corner and then it would show both techniques in one piece of work. I wanted to do this as I think the techniques compliment each other and when done together make the embroidery look like it has an added shadow.

Collagraphs

In today’s lesson we got string and glued it onto our paper, I chose to lay my string out in the shape of the off white logo. I did this because it is symmetrical and therefore I think that it will look better in a stamp format. I then went over it multiple times with purple ink and then stamped it onto another piece of paper.

Tie die

In today’s lesson I learned how to do tie die, to do this we took elastic bands and put them around screwed up pieces of calico. I wanted to go a bit further so I also included a technique called Shibori on mine so that after it had dyed I would have button shapes on the dyed parts. This worked really well as seen in the picture below.

Clipping Mask Tool Illustrator

In today’s lesson we were asked to find an image and edit it into a different background using the clipping tool on illustrator. I chose to use the lady walking as I felt hat I could most accurately add her into an image whee thee are other people walking, this is why I chose the image that I did. I decided to use Photoshop instead of illustrator as I am more experienced on Photoshop and I knew that it would not effect the standard of the edit.

Screen printing

In today’s lesson we learnt how to screen print. First we had to put ink straight onto a screen and then rolled it over the top of the calico which had our design rested over the top of it. This then allowed the ink to get onto the calico around my design.

I personally think that mine came out pretty well apart from the little bit of the square that sticks out either side. That is where I left the tape on by accident.

Batik

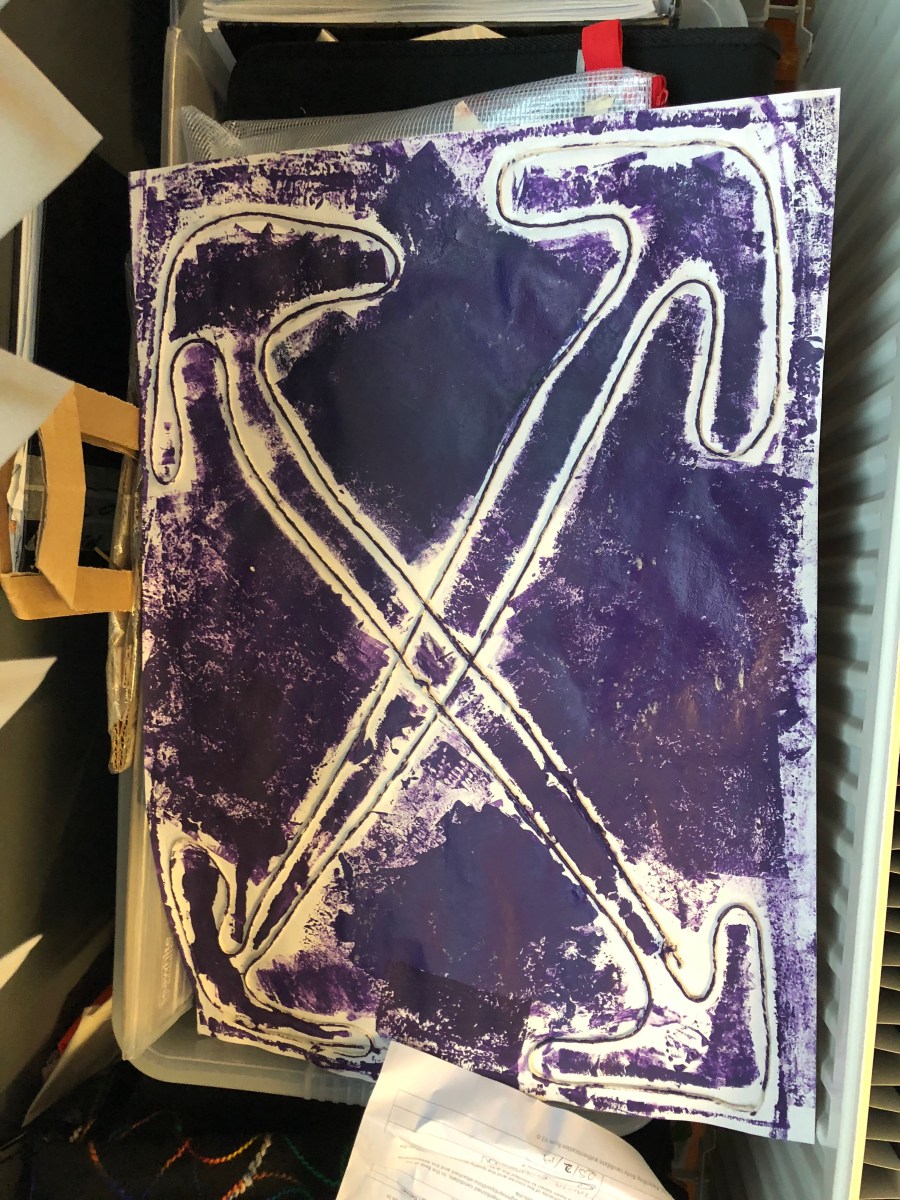
In today’s lesson we learned how to use wax to stop ink from staining certain parts of our fabric. This process is called Batik.

Firstly we heated up the wax pellets and then mixed them until it was a liquid.

Secondly we dropped the wax around the fabric creating an image on the fabric. We did this to so that the wax would act as a layer over the fabric therefore not allowing the ink to get onto that select part of the fabric. We then dyed the fabric which allowed for our design to stand out more than it did with it being in wax. After we dyed the fabric we then allowed it to dry on the radiators. Next we had to iron off the wax revealing the image in white underneath, I personally didn’t do this as I wanted to show the process. This doesn’t matter as the wax is clear and you can still see the design through it.