Monday 30th September

Today we started by going around the room and writing comments on at least 6 other people’s work so far, giving them things to improve on and things that they have done well.

The comments I received are:

1. Good: has altered original pattern for t-shirt. Improve: Finish trousers

2. I think that you have made a really good start after being in graphics. Your garments are well made too. In order to improve maybe extend your research further into the industry.

3. You have completed the work well.

4. I think your work is really good and you’ve added detail.

5. Finish trousers

6. Complete the homework with the cutting class and the online/own wardrobe similarities and differences.

In today’s lesson I am going to completely finish my trousers.

Wednesday 25th September

Today I started by finishing my cutting out of the calico. After I had done that I pinned the two legs together and sewed it up. I then realised that I had done it the wrong way round and spent 20 minutes unpicking the threads. Once I had finished that I sewed it up again but the correct way this time, but then when I went to sew up the second leg I found that it wasn’t the right size and it didn’t match up with the other leg so In my next lesson I will have to re-draw and cut-out my second leg and sew it to the other.

Tuesday 24th September

Today I started off by drawing up my design onto the calico, unfortunately I had to wait for about 15 minutes as other students had beaten me to it and a queue had formed. After I had drawn my design out I cut roughly around it so that the other students could use the calico and then carefully cut round the correct lines at my desk, making sure that I didn’t go over any lines to make sure they would fit.

Monday 23rd September

Today we started a new topic which was to design and make a pair of trousers. I started off by going through the sheet that was provided following the instructions step by step to make sure that my measurements were perfect so they would fit me. I struggled with this because I kept missing out key elements by accident and therefore would have to keep going back through the instructions to figure out what I’d missed. I finished my design about 5 minutes before the lesson ended which meant that I could draw it up and cut it out next lesson.

Wednesday 18th trial week

Today as soon as I got into the class I set up a sewing machine and finished the rest of my sewing so that I could try on my t-shirt to see how it fitted. But when I tried it on it was a bit too small and didn’t have anywhere for me to put my phone and other accessories so I decided to make three pockets on the front of it creating a perfect fit for my phone, earphones and wallet whilst still looking like a professional design.

Tuesday 17th trial week

In today’s lesson I started by drawing the outline another 3 times and cutting it out to create the back and front of the t-shirt, after that I drew up the sleeves and cut them out ready to be sewed.

Next I started to pin the lines that I was going to be sewing so that they didn’t move when the needle jolted through the material. Once I had successfully pinned my line together I sewed down the line removing the pins as I went to avoid the needle hitting one and snapping. Unfortunately when doing my third line I missed a pin and the needle struck it perfectly, breaking the needle. I then removed the broken needle and replaced it with a new one to carry on sewing my t-shirt.

Primary and Secondary Research

Primary Research is research that you have carried out yourself, this is helpful because you know that your sources are 100% factional and not written by some random guy trolling on Wikipedia.

Secondary Research is research that is carried out by someone else, this is helpful because if you find a reliable source you can use the information that they have got themselves which therefore saves you time.

Monday 16th trial week

Today I moved classes to fashion from graphics. I did this because I feel that it will steer me towards the career that I want, which is making my own brand.

In today’s lesson we designed a t-shirt, first of all we had to mark down the design using a pencil and a wooden rule. We also had an instructions sheet to follow which helped me a lot as I had missed the week where everyone else had learned how to design. I then drew up my outline onto the calico and then cut around it with a extra 1 cm seam allowance. I did this so that it wouldn’t be too tight for me when I came to wear it.

Type Sample Poster

A type sample poster is a poster that shows off a certain font, these posters normally have a sentence like ‘The quick brown fox jumps over the lazy dog.’ This is done to show off all of the letters in a sentence. Most of the time the poster will have a set of uppercase and lowercase letters with the sentence below. I personally like this setup because it helps the viewer to see the font from all angles.

Image result for type sample poster

I have created my own type sample poster using the font ‘Bodoni 72.’ I used a full alphabet of capital letters in the centre top of the poster and the lower case alphabet below it in the centre bottom. Below that I have a sentence that reads ‘Pack my box with five dozen liquor jugs.’ I decided to go for this sentence because I think that it will make the reader try and find all of the different letters to see if it actually is all of them as it isn’t the most popular sentence will all of the letters in. Unfortunately I saved the file to my desktop and not my memory stick so I can no longer access it.


Pattern Cutting

The definition of pattern cutting is: Pattern cutting is making a basic pattern, to your specific measurements, that you can adapt to make different styles or trousers, skirts or bodices. Because they are based on your own measurements the fit will be much better than with a commercial pattern that you buy.

This process is extremely important because if you get it wrong or the markings are slightly off you could ruin the entire garment. Now technology is in the picture pattern cutting is even more essential to the industry as more and more items are being sold online as well as in shops.

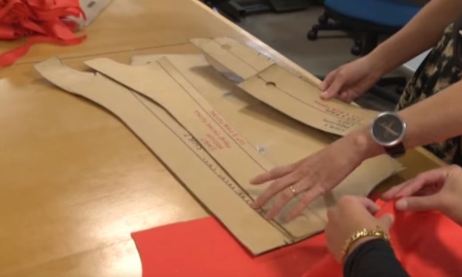
The first process is marking out the garment, this is usually done using a model or manikin to perfectly fit the desired look. Capture 2

Next you have to mark out the measurements on the fabric and then make sure that they’re perfectly drawn.

Capture 3

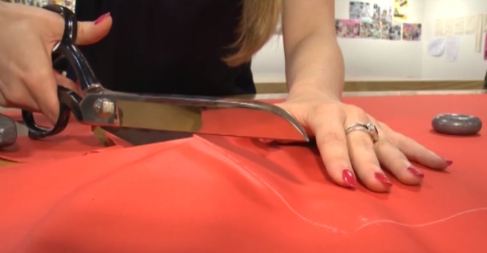
After that you will need to cut along the lines very carefully to make sure you stay in your desired line.

Capture 5

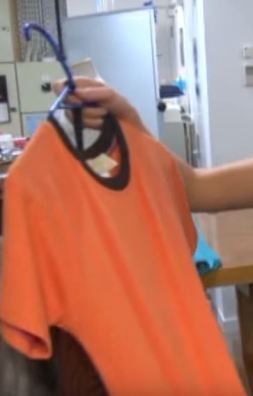
This is the finished design after they sewed it up and added on the collar. Unfortunately the lighting isn’t as good in the final picture therefore making it look a different colour to the previously cut fabric.

Capture 4